Showing posts with label Ilmu Pengetahuan. Show all posts

Friday, 8 June 2018

Mengatasi Tanaman Hias Brokoli Kuning Yang Layu

Tanaman ini termasuk tananam hias yang unik. Disamping warna daunnya yang bergradasi. Bentuk daun yang kadang melintir membuat pekarangan anda menjadi bagus dipandang jika di tanam.

Secara Terori berdasarkan artikel dan beberapa bacaan. Konon katanya tanaman ini mudah ditanam dan tahan terhadap panas. Bisa Saya katakan prakter di lapangan tidak semudah teori yang dijabarkan. Saya memberi 20 tanaman brokoli kuning dan ditanam di sekitar pekarangan. Dan seminggu setelah penanaman beberapa tanaman mulai mengering, layu dan mati. Posisi rumah saya berada 800m dari pantai. Beberapa orang mengatakan tanaman ini kuat terhadap panas. Yang jadi pertanyaan mengapa layu???

Tanaman yang mulai mengering

Kemudian disusul beberapa tanaman lain lagi yang mulai mengering dan mati seminggu berikutnya. Padahal Saya rutin menyiram dua kali sehari. Kemudian saya mendapati artikel lain mengenai cara perawatan airnya hanya sekali sehari. Saya mencoba metode tersebut namun hasilnya sama hingga tersisa 8 buah tanaman yang masih bertahan.

Dengan Kondisi demikian saya melalkukan beberapa eksperimen :
1. Menyiram air ketika kondisi tanaman sudah terlihat mulai layu.
2. Menyiram batang dan daun tanaman berharap tanaman tidak kepanasan. 

Namun cara terserbut tidak berhasil pula. Hingga pada beberapa waktu saya menemukan masalahnya. Tanah di sekitar tanaman terlalu padat. Ketika disiram maka tanah tersebut menggumpal bagian atas dan air tidak bisa masuk ke bagian akar. Ketika Tanah sekitar akar digali tanahnya kering. Cara mengatasinya adalah dengan :
1. menggemburkan tanah sekitar tanaman dan lubangi beberapa lubang yang tembus sampai akar tanaman.
2. Penyiraman cukup sehari sekali di lubang2 yang sudah dibuat.

Dan inilah beberapa tanaman yang berhasil diselamatkan
Ujung tanaman sudah tumbuh kembali

Demikianlah Tips untuk tanaman ini semoga membantu. Terimakasih

Monday, 7 March 2016

Solar Filter Hand Made untuk memotret Gerhana Matahari

Gerhana matahari adalah fenomena alam dimana tejadinya disebabkan oleh sejajarnya posisi bumi, bulan, dan matahari. Untuk gerhana matahari cahaya matahari di halangi oleh bulan sehingga cahaya matahari yang menuju bumi terhalang bulan.

Fenomena cahaya matahari yang akan terjadi tanggal 9 Maret 2016 merupakan gerhana matahari total yang melintasi 12 provinsi di Indonesia. Dimana provinsi lainnya hanya dapat menikmati gerhana parsial dengan persentasi berbeda tergantung letak geografisnya.

Fenomena ini sangat sayang untuk dilewatkan. Apalagi untuk para penyuka fotografi. Namun kadang keterbatasan alat menjadi halangan untuk memotret fenomena ini. Sanagat tidak disarankan untuk melihat gerhana matahari secara langsung tanpa alat bantu dan melihat langsung ke view finder kamera. Kali ini saya akan membagikan bagaimana cara membuat solar filter dengan alat sederhana yang mudah anda dapatkan.

Adapun yang alat dan bahan yang dibutuhkan :

Alat :
  1. Pisau Cuter ( Rp 5.000,-)
  2. Penggaris (Rp 1.000,- )
  3. Pulpen/pensil (Rp 1.500)
 
Bahan :
  1. Kaca Las Kentaro Shade (Rp 5.000,-)
  2. Lem Castol ( Rp 5.000,-)
  3. Kertas Karton (Rp 4.000,-)
Alat dan Bahan


 Dari alat dan bahan di atas kita akan membuat solar filter yang mirip dengan filter kotak yang biasa kita gunakan untuk memotret landscape, kita sebut saja filter kotak untuk memudahkan penyebutanya. Untuk langkah-langkan pembuatannya silahkan di simak dibawah ini.


1. Pembuatan Kaca Las Holder.
    Untuk pembuatan kaca las holder dibuat dengan ukuran yang sedikit melebihi dari dimesi kaca las sendiri sehingga pada saat pemasangan kaca tidak lepas dari kertas karton. Potong kertas kartu melebihi ukuran kaca, lubangi bagian dalam sehingga cahaya matahari nantinya dapat memalintasi kaca las. Untuk lebih jelas silahkan perhatikan gambar.

Kaca Las Holder
 

2. Pembuatan Tabung Penghubung ke Lensa
    Kemudian setelah kaca las holder selesai di buat, selanjutnya adalah pembuatan tabung penghubung ke lensa. Untuk diameter dari tabung sendiri harap disesuaikan dengan ukuran diameter ujung lensa anda sehingga nantinya dapat di pasang pada ujung lensa.
Tabung Penghubung
 
 Untuk panjang tabung mohon sesuaikan dengan kebutuhan untuk meletakkan pada lensa agar filter nantinya tidak jatuh. Langka selanjutnya adalah membuat potongan kertas karton dengan dimensi sama dengan dimensi kaca las holder pada langsa sebelumnya dengan membuat lubang yang sedikit berbeda. Lubang selanjutnya berdiameter sama dengan diameter tabung penghubung ke lensa. Perhatikan gambar.
Potongan karton

 Untuk langkah selanjutnya adalah penggabungan dari tabung penghubung dengan potongan karton yang sudah di lubangi. Gunakan lem caston untuk bahan perekat dari tabung penghubung.

Setelah di Lem

3. Penggabungan / Assembly semua bagian
    Setelah semua bagian selesai di persiapkan maka langkah akhir dalam penyelesaian  adalah penggabungan semua bagian sehingga dapat kita gunakan untuk memotret nantinya. Sebelum melakukan langkah penggabungan pastikan anda sudah menyelesaikan semua bagian seperti tampak pada gambar.

Kaca Holder dan tabung penghubung


Selanjutnya tambahkan lem pada tepian kaca las pada bagian kertas karton secara merata, biarkan setengah kering. kemudian tempelkan pada bagian tabung penghubung bagian depannya. Sehingga hasil akhirnya seperti di gambar.

Hasil penggabungan


 Pekerjaan anda sudah selesai tinggal menunggu kering. Solar Filter Hand Made sudah selesai di buat. tinggal di pasang pada ujung lensa. Dan siap memotret.

Pemasangan pada kamera

Meskipun dengan dana yang bisa dikatakan terjangkau dengan total penghabisan : Rp 21.500 anda sudah siap untuk memotret gerhana matahari pada tgl 9 Maret 2016. Hasilnya jepretannya cukup memuaskan dengan hasil tes pada siang hari sebagai berikut :

Hasil jepretan

Sekian dan terimakasi tips dan trik membuat solar filter handmade. Atas perhatian dan kunjungannya saya ucapkan terimakasih.


Tuesday, 20 January 2015

FujiColor C200 sample images


Performa yang sangat baik dari roll film Fujicolor, sesuai selera saya, memiliki saturasi warna yang pas, sangat cocok untuk street hunting fotografi. Sebenarnya saya membeli roll film ini dengan harga yang lumayan murah 18rb sebiji nya tahun 2013 akhir di Bandung. Kemudian baru saya gunakan pada tahun 2014 awal, Yah hampir setahun lamanya dan saya simpan di dalam Kulkas untuk menjaga hasil film tetap baik.

Adapun beberapa hasil jepretan dari fuji color ini adalah


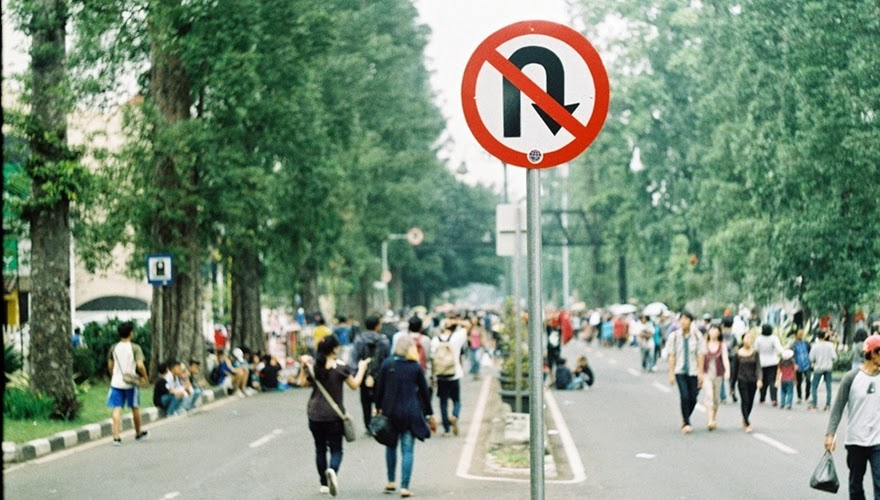
Fujicolor + Asahi Pentax + Helios.  (Car Free Day Dago Bandung)


 Fujicolor + Asahi Pentax + Helios.  (Car Free Day Dago Bandung)


 Fujicolor + Asahi Pentax + Helios.  (Car Free Day Dago Bandung)


 Fujicolor + Asahi Pentax + Helios.  (Car Free Day Dago Bandung)


 Fujicolor + Asahi Pentax + S-M-C Takumar 50mm f1.4.  (Cikapundung Bandung)


                                    Fujicolor + Asahi Pentax + Helios.  (Car Free Day Dago Bandung)

Sunday, 21 December 2014

How to Fix Asahi Camera Light Meter

         Asahi Pentax is one of the famous brand camera from Japan beside Nikon, Canon, and Minolta. Great built in body and its looks like samurai warrior from Japan. But nowadays I often found Asahi Pentax camera in junk store or second hand camera store in dead light meter condition. Several conditions might be caused the light meter doesn’t work such as : due its age, copper wire inside light meter is coated by rush, broken copper wire etc.  If you are analog lover is so sad to facing this condition. After several experiments I found some way to fix and bring the light meter back to normal. This method Couldn't fix your light meter if the copper wire inside the light meter is broken.

equipment


What equipment you may need?
  1. Single battery which has capacity 1.5Volt
  2. wires
  3. Tape
  4. Scissor  
Step by step
  1.  Open battery cap chamber in bottom plate of you camera.
    Bottom plate
  2.  After that you will find 2 contact surfaces. One is for negative pole, and second one is for positive pole.
  3. Remove isolator of your wires until you see copper wire.
  4. Take your battery and install the wire in both side pole of you battery using tape.
    Battery
  5.  Before you apply to using battery and wire please make sure you light meter switch is on position.
    LM switch
  6.  This is the IMPORTANT step you should pay attention. After you install the wire with battery now get ready for this part. Take the wire from positive pole from you battery put it on bottom plate(near by the hole) and take the wire form negative pole and RUBBING in surface area inside battery chamber, DO NOT Allowed the wire contact for long time to avoid overload circuit.
    Applied
  7. Be careful do not MISPLACED  between positive pole and negate pole. Because this camera using DC circuit, to avoid short circuit.
And after those steps are applied install small battery (watch battery or LR44 battery) and check your light meter. Hope it becoming normal and work properly. 

Best Regards, Marlon

 NOTE : You applied this method with your OWN RISK. 

Tuesday, 19 August 2014

Program Editing Photoscape

Saya coba share sedikit yang saya tau tentang editing foto, Memang terkadang kendala kita adalah programing editing foto yang lumayan rumit dan tidak user friendly untuk kebanyakan orang. Disamping spesifikasi komputer kita yang terbatas yang tidak bisa menjalankan program dengan visual yang tinggi. Berdasarkan kendala tersebut saya akan mencoba share cara editing video sederhana.

Mari kita langsung ke langkah-langkan editing. Hal yang perlu anda siapkan adalah :
1. Laptop/ PC dengan spesifikasi standar saja.
2. Aplikasi Photoscape, jika tidak punya bisa download disini (DOWNLOAD)
3. Setelah download buka aplikasi tersebut.
Anda sudah selesai mempersiapkan bahan-bahanya.Kini ke langkah untuk editing foto

Kini siapkan foto yang akan di edit, pada contoh ini saya menggunakan foto milih saya

1. Foto sample


2. Klik kanan pada foto sample, dan pilih "Open With = Photoscape" atau anda buka Photoscape kemudian drag foto yang akan di edit ke photoscape. Maka akan terlihat tampilan seperti di bawah ini.:

3. Untuk editing foto silahkan ikuti langkah berikut :
a. Resize foto anda ke sisi terpanjang 900px (panjang sisi terpanjang tergantung selera anda) saya sarankan jika akan di upload di media sosial ada baiknya menggunakan 900px jadi gambar tidak terlalu di kompress ketika di upload.
b. Pada gambar di bawah pada no.2 dilihat ukuran gambar ukuran foto yang akan berubah jika sudah di rezise.
c. Kemudian klik "Auto Level" dapat dilihat pada no.3 di gambar di bawah, untuk memperbaiki white balance dan pencahayaan foto.
d. Jika dirasa sudah cukup bisa Klik "Save"


4. Namun jika anda ingin menghilangkan bagian gambar yang merasa mengganggu bisa di lanjutkan dengan langkah sebagai berikut.
a. Klik 'Tools" pada kolom navigasi di sebelah kiri bawah (lihat gambar).
b. Klik "Clone Stamp" yang terlihat pada langka no.5 di gambar di bawah.
c. Klik bagian yang menjadi Acuan warna anda (lihat langkah no.6).
d. Arahkan Pada bagian yang akan di hilangkan (lihat langkah no.7).
e. Maka anda akan melihat bagian yang ter clone (lihat langkah no.8)
f. Save kembali hasil kerja anda. 


Selamat Mencoba, Semoga Sukses

Sunday, 25 May 2014

SOLAR HOME SYSTEM IN KUBU VILLAGE, KARANGASEM BALI

SOLAR HOME SYSTEM IN KUBU VILLAGE, KARANGASEM BALI


I. INTRODUCTION

        Energy supply in the future is a problem that attracts attention of all nations, because human welfare in modern life is closely related to the amount and quality of energy used. The global energy consumption is likely to grow faster than the population growth. The fuel consumption was growing from 6630 million tons of oil equivalents (Mtoe) in 1980 to almost double reaching 11,163 Mtoe in 2009. This projected consumption will increase 1.5% per year until 2030 and will reach 16,900 Mtoe and the main drivers of this growth are developing countries in Asia.
        The energy consumption is mainly based on fossil fuels which account for 88.1% whereby with crude oil consisting of 34.8%, coal 29.2% and natural gas 24.1%. However the share of nuclear energy and hydroelectricity are very small with only 5.5% and 6.4% respectively. At current production rates, global proven reserves for crude oil and natural gas are estimated to last for 41.8 and 60.3 years respectively. Furthermore, the fossil fuels will significantly contribute to the emission of greenhouse gases (GHG) from the combustion and raising the climate change issue. Thus, the new and renewable energies will become one of the main energy sources for the world. Currently, renewable energy contributes only 11% of the total global energy used.


II.  SOLAR CELL AND GLOBAL POLICIES

Why solar energy we choose as a renewable energy, because Solar energy is the most promising backup energy as it has many advantages over other resources. Solar energy is a naturally available and clean energy source derived from the sun that can be exploited directly to generate electricity. No release of pollutant, low maintenance and high reliability, with life span expectation of 20–30 years made solar power a favorable source of energy to be used in the future. Policies already released to support  reducing emission in the world. A variety of policies like feed-in-tariff (FIT), portfolio standard (RPS), tax credits, pricing laws, production incentives, quota requirements, trading systems etc. have been developed and implemented to promote the use of renewable energy (RE) .These strategies have main objective such as reducing the environmental impacts of the energy sector, reducing reliance on fossil fuels and encouraging new industrial development. Yet the renewable portfolio standard (RPS) and the feed-in tariff (FIT) are the most popular. Though there exist a lot of debates surround their effectiveness, expecting a choice that has to be made between them. For this, it could be decided by the countries that which Renewable Energy policy can be applicable in their own particular circumstances and objectives. According to Ekins “No optimal model has emerged, and probably none will do so in the contexts that is shaped by different histories and cultures”.


III. RURAL AREA IN EAST BALI ISLAND

Rural area is defined as a region, which is not urbanized. One of the main characteristics of rural area is its low population density is one of the common highlights of rural areas. Normally high portions of the lands in rural areas are devoted to agricul- ture. On the other hand, there are vast arid regions around the world that are also considered as rural areas. Therefore, there is no unique definition of the rural area that can be applied to all regions in the world and it can be variable from each country to another. However, the most critical aspect in the rural area rather than low population density is less access to energy sources, lack of education, health, and welfares. Increasing access to affordable and reliable energy services is an approach to reduce the energy poverty in these regions. For this case we consider the rural are as describe below

Location : Ban Village, Kubutambahan District, Karangasem Regency
Koordinate :
-       Latitude      :  - 8.276387
-       Longitude   : 115.484748

Map of Bali Island
We have several reasons why we choose solar sell energy system in this area :
  •   Rural area
  • Water is quite hard ( water resources in this area small, not enough to use micro hydro
  • Location in behind Mountain (Mountain Agung) which is quite hard to install wind turbine because the velocity average in this area is low.


An alternative we can applied in this area is Solar Home System, because the distance between one house to the other house is quite far. They replace kerosene lamps and candles traditionally used for lighting. Typically, a rural family will spend between $5-$10 per month on energy and lighting expenses. Furthermore, fumes produced from traditional lighting methods are toxic and lead to chronic lung problems, especially when children are exposed. Generally, a family will use about 3 liters of kerosene per month. Using these dimmer sources of light for studying or handicraft production can strain the eyes and cause long-term vision problems. Having a solar system will allow children to study and small businesses to continue production later into the night. This increases the population’s ability to be self-sufficient, raises their incomes, and allows them to begin to lift themselves out of poverty.


IV. SOLAR  HOME  SYSTEM TECHNOLOGY

        A solar-home-system uses a photovoltaic (solar-electric) module to provide power for lights and small appliances. The system also needs a rechargeable battery, so that power is still available at night and on cloudy days. Solar-home-systems bring huge benefits to homes in developing countries which aren’t connected to the mains electricity grid. They replace smoky, unsafe kerosene lamps with brighter light, allowing work, study and social activities after dark. They also power radios and cell phone chargers, enabling families to be in contact with the wider world. The smallest systems are solar lanterns, which can be moved around the home or carried outdoors.
      Solar-home-systems and solar lanterns already provide power to millions of homes in Asia, Africa and Latin America. Similar systems are also used in off-grid schools and health centers. How a solar-home-system works  Photovoltaic (PV) modules use semiconductor materials to generate d.c. electricity from sunlight. A large area is needed to collect as much sunlight as possible, so the semiconductor is either made into thin, flat, crystalline cells, or deposited as a very thin continuous layer onto a support material. The semiconductor must be sealed into a weatherproof casing, with suitable electrical connectors.

       PV modules are specified by their ‘watt-peak’ (Wp) rating, which is the power generated under standard conditions, equivalent to bright sun in the tropics (they still work at lower light levels though). Most solar-home-systems use modules between about 10 Wp and 100 Wp rating. The rechargeable batteries store spare electricity on sunny days, so that it is available at night and on cloudy days. They also provide a stable voltage (usually 12 V) for the devices which use the electricity. Standard lead-acid car batteries can be used, but they don’t last long if they are heavily discharged, so specially-made solar versions are strongly recommended. Other types of rechargeable battery like nickel-cadmium and nickel-metal-hydride are increasingly used, particularly in small systems like solar lanterns. They are more expensive, but easier to make small and portable, and more tolerant of being heavily discharged. All equipment run directly from the PV supply must be designed for 12 V d.c. operation. Efficient lights and appliances make best use of the limited supply of electricity.
        Efficient d.c. fluorescent lights are available down to about 3 or 4 W power rating, in both tube and compact forms. LED lights are even more efficient, and are now sufficiently cheap and reliable to be used as well. In most systems, an electronic charge-controller is used to protect the battery from being overcharged (when it is very sunny) or over-discharged (when people try to get too much electricity from the system). The charge controller usually has lights or a meter to indicate the state-of-charge of the battery.

How To Use M42 (Screw Mount) Lenses in Digital Camera

M42 screw mount was first used in ZeissContax S of 1949; this East German branch of Zeiss.  M42 × 1 mm standard mount cameras first became well known in Japan under the Praktica brand, and thus the M42 mount is known as the Praktica thread mount there. Since there were no proprietary elements to the M42 mount, many other manufacturers used it; this has led to it being called theUniversal thread mount or Universal screw mount by many.

Example of Screw mount


Very easy to use M42 screw mount in digital cameras (interchange lens type). Just use adapter, you can buy thoses adapters in your local store or online shop. Depend on camera you use. Here some i write the list of adapter which is available in store for you digital camera. 


  1. M42 to Canon EOS  => available with or without Chip AF confirm. AF confirm will allow you to activated the "Beep" sound, you still use your hand to turn down the focusing ring (no motor drive in manual lens) 
    M42 to EOS non-Chip


      M42 to Eos with Chip


  2. M42 to Nikon => will not be able to allow you capture until infinity focus, in many case only 2m. It happened because flanger register of nikon is longer than m42 screw mount. To make the camera can focus infinity you would need an adapter with optic correction which is reduce the image quality.
  3. M42 to Micro 4/3 => micro 4/3 (crop factor 2) very easy to adapt this kind of lens just buy adapter M42 to M4/3.
  4. M42 to Sony Alpha Mount => same as canon, sony alpha which is "A" mount adapt M42 mount is not a big deal.
    M42 to M4/3

Share

Twitter Delicious Facebook Digg Stumbleupon Favorites More